はじめに
Bluetoothエンジニアのharadaです。
Android 16でBluetooth 6.0のチャネルサウンディングがサポートされましたね 🎉
チャネルサウンディングは、従来のRSSI (電波強度) を使った距離推定とは異なり、センチメートル級の精度で距離を測定できる 技術です。スマートロックやデジタルキーなど、「近づいたら解錠」といったユースケースで活用が期待されています 🔑
この記事では、実際にPixel 10とNordic nRF54L15 DKを使って動作確認した経験をもとに、Androidでのチャネルサウンディング実装方法を紹介します。
ちなみに、動かすまでにかなりハマりました...😕 そのあたりも共有します。
制限事項
2025/12/20時点で、Bluetoothチャネルサウンディングに対応したAndroid端末は限定的です。 Nordic Semiconductorの記事 によると、Android 16 QPR2をインストールしたPixel9シリーズまたはPixel 10シリーズでBluetoothチャネルサウンディングの動作が確認可能、とのことです。
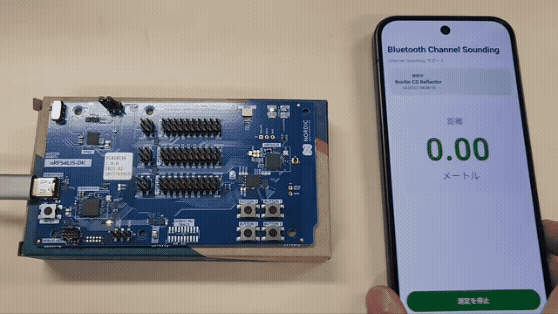
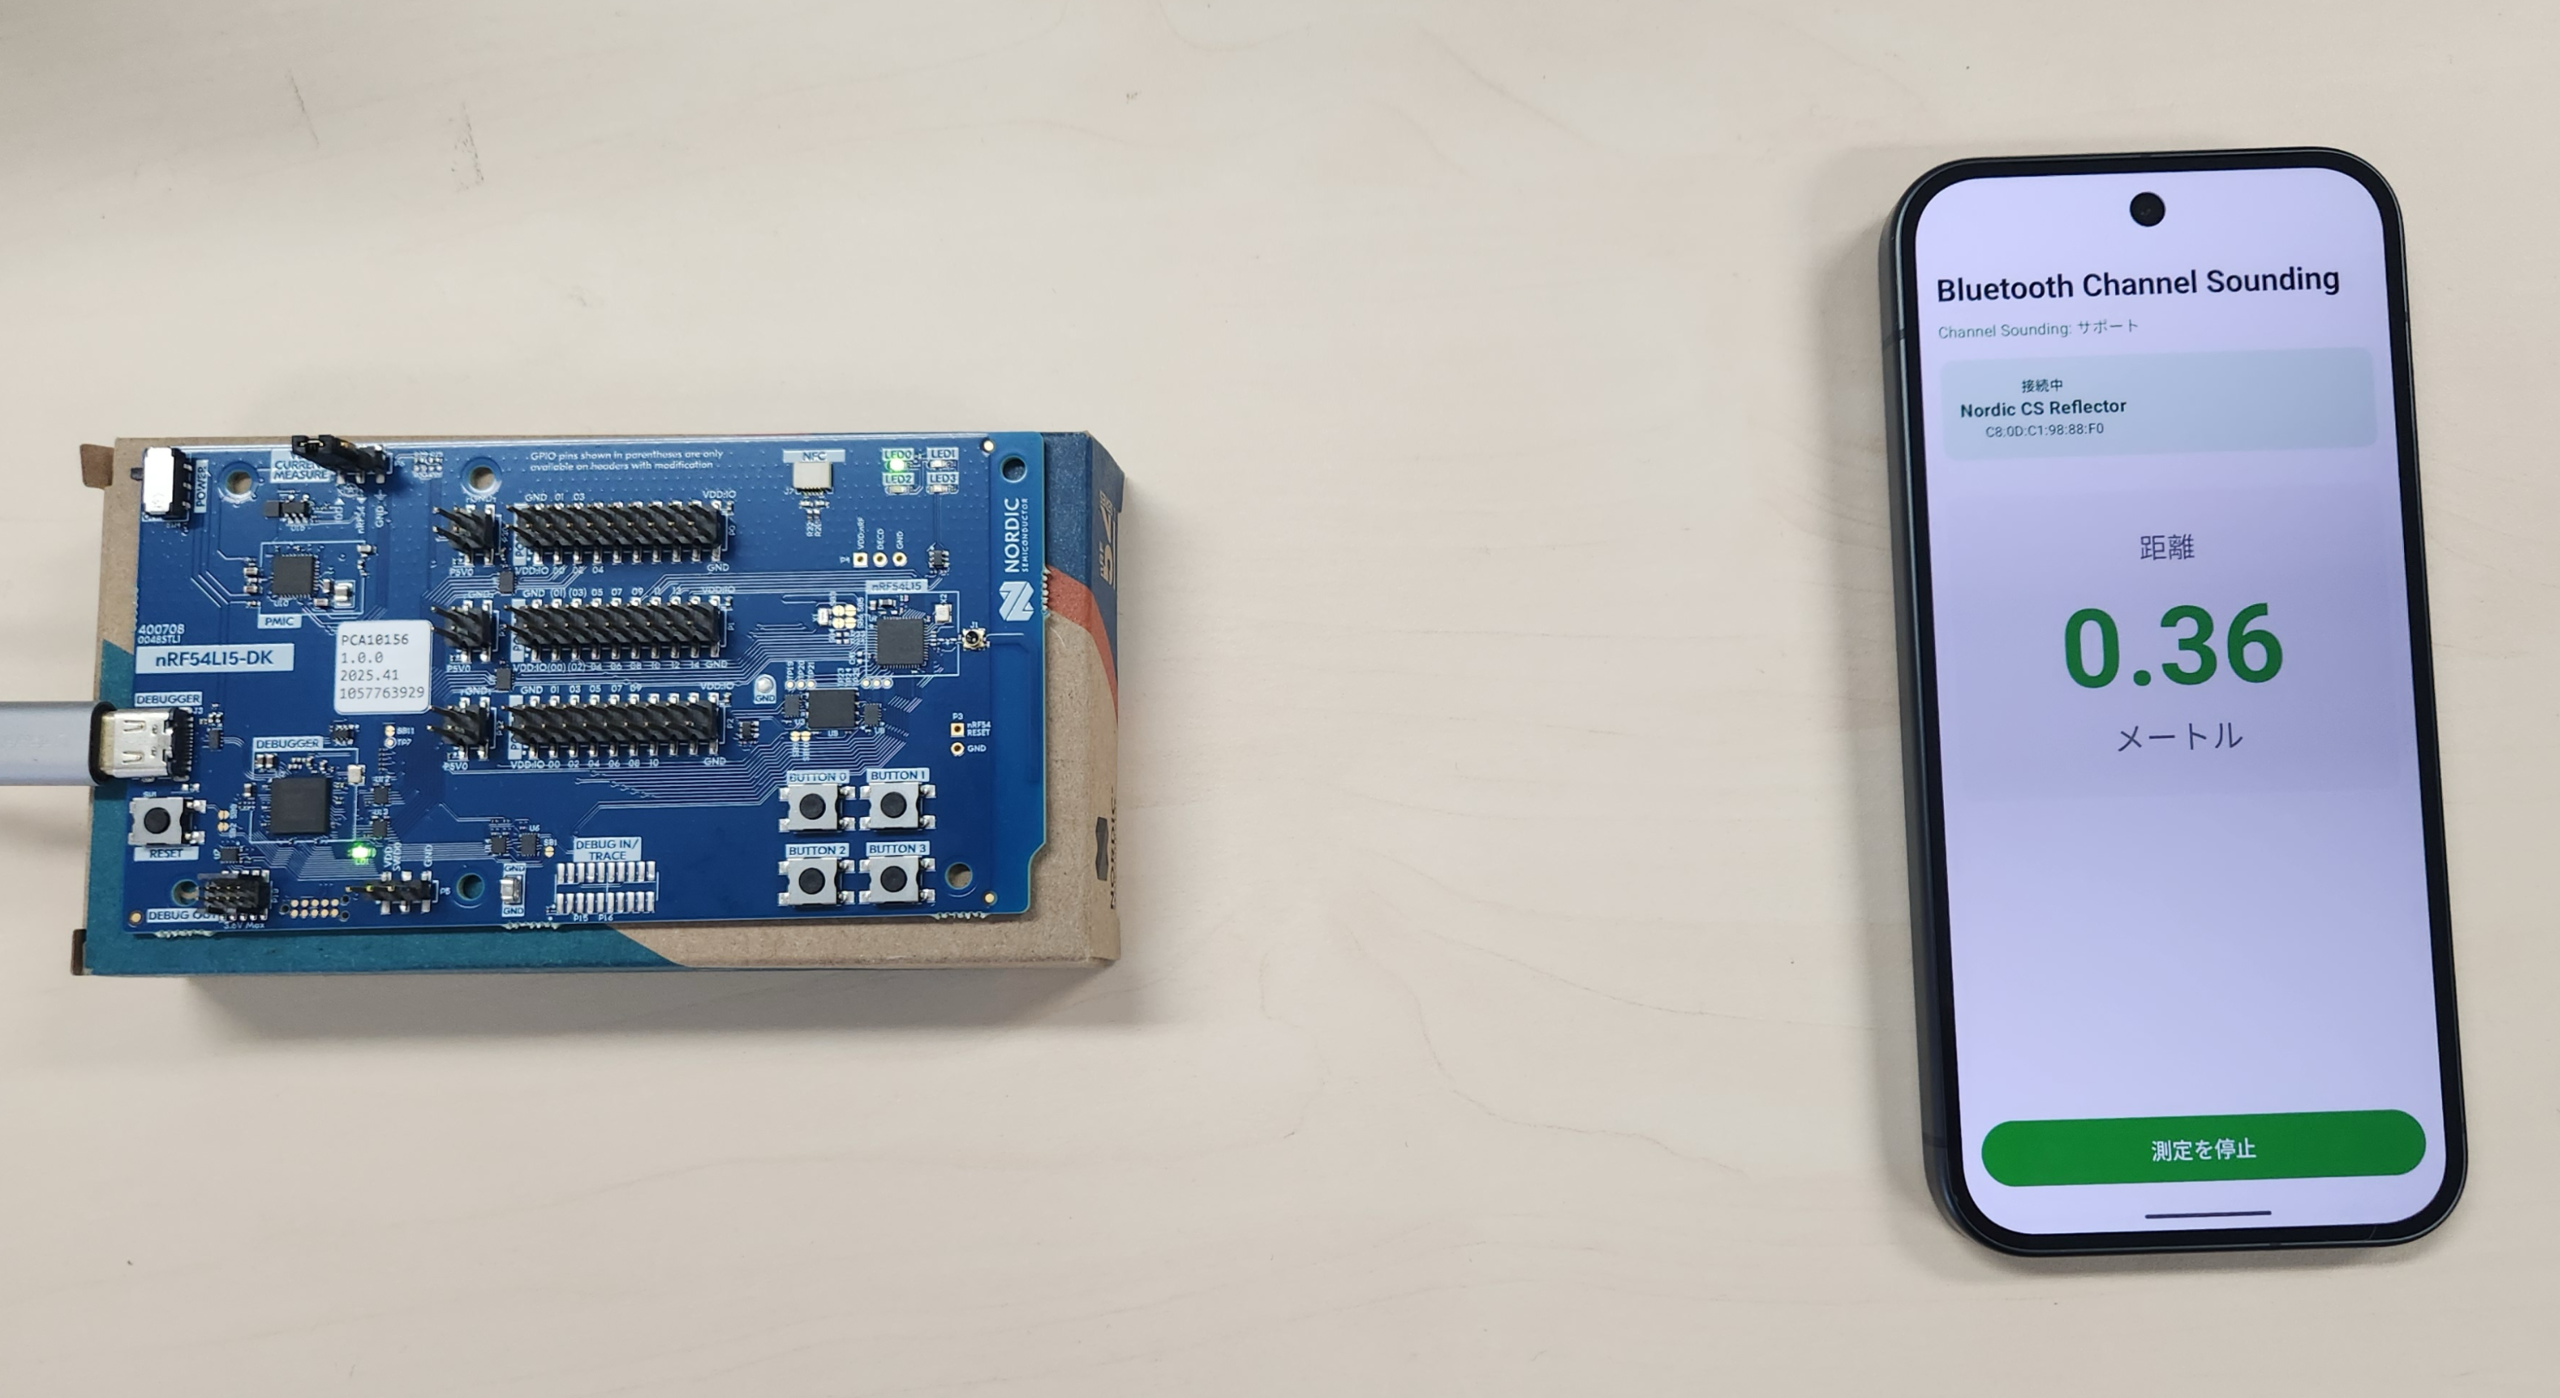
チャネルサウンディングの動作の様子
nRF54L15とPixel 10の距離をリアルタイムで測定しています。
チャネルサウンディングとは
Bluetooth 6.0で追加された距離測定技術です。
位相ベース測距(PBR)と往復時間(RTT)を組み合わせた高精度な測距技術です。 2.4GHz帯の複数チャン ネルを用いて信号の「位相のズレ」と「飛行時間(Time of Flight:飛行時間)」を解析することで、±数十センチ程度の精度で距離を推定。 従来のRSSI方式に比べ、環境の影響を受けにくく、改ざん不能な物理的距離に基づいた安全な通信を実現します。
従来のRSSIと何が違う?
| RSSI | チャネルサウンディング | |
|---|---|---|
| 精度 | 数メートル | ±数十センチ程度の誤差 |
| 原理 | 電波強度 | 位相ベース測距 |
| 環境影響 | 大きい | 小さい |
RSSIは「電波の強さ」で測るため、障害物や反射の影響を受けやすく誤差や偽装の懸念がありました。一方、チャネルサウンディングは「位相のズレ」に加え「信号の往復時間」を直接測定します。これにより、環境に左右されない正確な測距と、リレーアタックを防ぐ高い安全性を両立しています。
※リレーアタックは、スマートキー等が発する電波を特殊な機器で中継(リレー)し、離れた場所にある鍵を解除する方法です。
用語
- Initiator: 距離を算出する側
- Reflector: Initiatorに応答する側
動作環境
今回使った環境はこちら。
- Initiator側:Android 16 QPR2をインストールしたPixel 10
- Reflector側:Nordic Semiconductorの開発キットnRF54L15 DK
※nRF54L15 DK にはReflector用のファームウェア channel_sounding_ras_reflector を利用しました。
RangingManager API
Android 16で追加されたRangingManagerは、統一されたAPIで複数の測距技術をサポートしています 📡
今回扱うのは Bluetooth Channel Soundingです。
| 技術 | 精度 | 特徴 |
|---|---|---|
| UWB | ±10cm程度 | 最も高精度 |
| Bluetooth Channel Sounding | ±数十cm程度 | 今回使うのはこれ |
| WiFi RTT | ±1m程度 | WiFi APの位置情報を利用 |
| Bluetooth RSSI | 数m程度 | 従来の電波強度ベース |
Androidアプリに必要なパーミッション
<uses-permission android:name="android.permission.BLUETOOTH_CONNECT" />
<uses-permission android:name="android.permission.BLUETOOTH_SCAN" />
<uses-permission android:name="android.permission.ACCESS_FINE_LOCATION" />
<uses-permission android:name="android.permission.RANGING" />
RANGINGがAndroid 16で新規追加された権限です。これがないと動きません!
処理の流れ
全体の流れはこのような流れです。
| No | ステップ | 説明 |
|---|---|---|
| 1 | BLEスキャン | Reflectorデバイスを探す |
| 2 | GATT接続 | BLE GATTの接続を確立 |
| 3 | GATTサービス検出 | RAS Service (0x185B) を検出 |
| 4 | ペアリング | RAS Control Point書き込みでトリガー |
| 5 | Ranging開始 | RangingSessionを作成して開始 |
| 6 | 距離取得 | onResults()で距離を取得 |
シーケンス図
%%{init: {
  'theme': 'base',
  'themeVariables': {
    'primaryColor': '#fff',
    'primaryTextColor': '#000',
    'primaryBorderColor': '#710000',
    'lineColor': '#ffffff',
    'secondaryColor': '#fff',
    'tertiaryColor': '#fff',
    'actorTextColor': '#000',
    'actorLineColor': '#fff',
    'signalColor': '#ffffff',
    'signalTextColor': '#ffffff',
    'labelBoxBkgColor': '#fff6a5',
    'labelBoxBorderColor': '#fff6a5',
    'labelTextColor': '#000',
    'loopTextColor': '#fff',
    'noteTextColor': '#000',
    'noteBkgColor': '#fff'
  }
}}%%
sequenceDiagram
    participant App as App(Initiator)
    participant Android as Android
    participant Device as nRF54<br>(Reflector)

    Note over App,Device: 1. BLEスキャン
    App->>Android: startScan()
    Android->>Device: BLEスキャン
    Device-->>Android: アドバタイズ応答
    Android-->>App: onScanResult()

    Note over App,Device: 2. GATT接続
    App->>Android: connectGatt()
    Android->>Device: GATT接続
    Device-->>Android: STATE_CONNECTED
    Android-->>App: onConnectionStateChange()

    Note over App,Device: 3. GATTサービス検出
    App->>Android: discoverServices()
    Android->>Device: GATTサービス検出
    Device-->>Android: RAS Service (0x185B)
    Android-->>App: onServicesDiscovered()

    Note over App,Device: 4. ペアリング
    App->>Android: writeCharacteristic()
    Android->>Device: RAS Control Point (0x2C17) 書き込み
    Device-->>Android: ペアリング要求
    Android-->>App: ペアリングダイアログ表示
    App->>App: ユーザーが承認

    Note over App,Device: 5. チャネルサウンディング開始
    App->>Android: createRangingSession()
    Android-->>App: RangingSession
    App->>Android: session.start(RawInitiatorRangingConfig)
    Android->>Device: CS開始
    Device-->>Android: CS応答
    Android-->>App: onStarted()

    Note over App,Device: 6. 距離測定
    loop 測定間隔ごと
        Android->>Device: CS測定
        Device-->>Android: 測定結果
        Android-->>App: onResults(distance)
    end
実装のポイント
1. RawInitiatorRangingConfigを使う
ここが今回一番ハマったところです 🤔
AndroidのRanging APIには2つのモードがあります。
- OobInitiatorRangingConfig:Out-of-Band(帯域外) BLE GATTで測定に必要なパラメータをやりとりする方法
- RawInitiatorRangingConfig:測定パラメータを直接指定する方法
最初はOobInitiatorRangingConfigで実装しましたが、NordicのReflectorと通信するとプロトコルエラーになりました。 Nordicのサンプルコード を見ると、RawInitiatorRangingConfigを使っていたので 、そちらに変更したら動きました!Nordic nRF54L15 DKのファームウェアがBLE GATT経由でのRangingパラメータ交換に対応していないことが原因のようです。
2. ペアリングが必要
nRF54L15 DKのサンプルアプリでチャネルサウンディングを動かすには、ペアリングが必要です。ペアリングは、RAS Control Point (UUID: 0x2C17) への書き込みでトリガーできます。 ペアリング未完了のままRangingを開始すると、onClosed(reason=3) (PROTOCOL) エラーになるので注意してください。
コード例
実際に動いたコードを紹介します。
GATT接続とペアリングトリガー
GATT接続シーケンスの中でペアリングを発動させています(なぜか事前にペアリング済みだと上手く動かない…)
class BleGattConnector(private val context: Context) {
    private val rasServiceUuid = UUID.fromString("0000xxxx-0000-1000-8000-00805f9b34fb")
    private val rasControlPointUuid = UUID.fromString("0000xxxx-0000-1000-8000-00805f9b34fb")
    private var gatt: BluetoothGatt? = null

    fun connect(device: BluetoothDevice): Flow<ConnectionState> = callbackFlow {
        val callback = object : BluetoothGattCallback() {
            override fun onConnectionStateChange(gatt: BluetoothGatt, status: Int, newState: Int) {
                when (newState) {
                    BluetoothProfile.STATE_CONNECTED -> {
                        // 接続成功したらサービス検出へ
                        gatt.discoverServices()
                    }
                    BluetoothProfile.STATE_DISCONNECTED -> {
                        trySend(ConnectionState.Disconnected)
                        close()
                    }
                }
            }

            override fun onServicesDiscovered(gatt: BluetoothGatt, status: Int) {
                if (status == BluetoothGatt.GATT_SUCCESS) {
                    // ★ペアリングをトリガー(暗号化が必要な特性への書き込み)
                    triggerPairing(gatt)
                    trySend(ConnectionState.ServicesDiscovered)
                }
            }
        }

        gatt = device.connectGatt(context, false, callback, BluetoothDevice.TRANSPORT_LE)

        awaitClose {
            gatt?.close()
            gatt = null
        }
    }

    /** 特定のGATTキャラクタリスティックに書き込みを行いペアリングをトリガーする **/
    private fun triggerPairing(gatt: BluetoothGatt) {
        val controlPoint = gatt.getService(rasServiceUuid)
            ?.getCharacteristic(rasControlPointUuid) ?: return

        // 実際のアプリではOSのダイアログが出るきっかけになります
        controlPoint.value = byteArrayOf(0x00)
        gatt.writeCharacteristic(controlPoint)
    }
}
ポイントはtriggerPairing()です。RAS Control Pointに書き込むことでペアリングダイアログが表示されます。
チャネルサウンディング開始
GATTに接続したBluetoothデバイスを使って測距セッションを開始させます。
class CsManager(context: Context) {
    private val rangingManager = context.getSystemService(RangingManager::class.java)
    private var session: RangingSession? = null

    fun startRanging(target: BluetoothDevice) {
        session = rangingManager.createRangingSession(executor, callback)
        session?.start(buildPreference(target))
    }

    private fun buildPreference(device: BluetoothDevice): RangingPreference {
        val rangingDevice = RawRangingDevice.Builder()
            .setRangingDevice(
                RangingDevice.Builder()
                    .setUuid(UUID.nameUUIDFromBytes(device.address.toByteArray()))
                    .build()
            )
            .setCsRangingParams(
                BleCsRangingParams.Builder(device.address)
                    .setRangingUpdateRate(RawRangingDevice.UPDATE_RATE_NORMAL)
                    .setSecurityLevel(BleCsRangingCapabilities.CS_SECURITY_LEVEL_ONE)
                    .build()
            )
            .build()

        val config = RawInitiatorRangingConfig.Builder()
            .addRawRangingDevice(rangingDevice)
            .build()

        return RangingPreference.Builder(RangingPreference.DEVICE_ROLE_INITIATOR, config)
            .setSessionConfig(sessionConfig)
            .build()
    }
}
RawInitiatorRangingConfigを使うのがポイントです!
ハマりポイントまとめ
私がハマったポイントをまとめます 😖
❌ ペアリング未完了だとプロトコルエラー
onClosed(reason=3) (PROTOCOL) エラーになります。ペアリング完了を待ってからRangingを開始してください。❌ OobInitiatorRangingConfigでは動かない nRF54L15 DKのReflector ファームウェアはRawInitiatorRangingConfigに対応しています。
まとめ
Android 16でBluetooth チャネルサウンディングが利用可能になりました。
実装のポイントをまとめると:
1. RawInitiatorRangingConfigを使う(OOBは使わない)
2. Ranging開始前にGATT接続を確立する
3. ペアリング完了を待つ
ドキュメントがまだ充実していないのでハマりどころはありますが、動いた時は感動しました ✨ 今後は、より多くのデバイスでチャネルサウンディングがサポートされることを期待しています!
参考リンク
- Range between devices | Connectivity | Android Developers
- nRF54L15 DK - Nordic Semiconductor
- https://devzone.nordicsemi.com/nordic/nordic-blog/b/blog/posts/evaluating-bluetooth-channel-sounding-with-our-open_2d00_source-android-app-on-google-pixel-10
- GitHub - NordicSemiconductor/Android-nRF-Toolbox: The nRF Toolbox is a container app that stores your Nordic Semiconductor apps for Bluetooth Low Energy in one location.